Sunday, October 31, 2010

Thai Tea Cake

My sister-in-law is a cake lover and expert ( not as a maker but taster! lol)  and she is always happy to be my judge ( or actually victim ) everytime I pay her family a visit and have a chance to make cakes! The first time I made this Thai tea cake is when I visited my home country just two weeks ago as requested by my sister-in-law and got a good feedback about it, so the cake kind of passed a QC and wouldn't let other people down !   

Back here in HK since I've still got a lot of tea powder that I brought back..so instead of leaving it unused, I decided to make it again but this time I used a different recipe for a cake base ( first time I made chiffon but this time I chose sponge ).

As for a verdict, I personally think that there is no difference in taste between chiffon and sponge bases because both went along well with the gorgeous filling and topping ( which are the same mixture )..so, if you happen to fancy Thai style milk tea, then this cake is really worth your try and I can guarantee how much you would be pleased with the taste.. no matter what base you choose !!

You could find two recipes I've used from here ...goodluck and enjoy !


Apple and Cheddar Cheese Scones

Scone is one of few things that I've repeatedly made, yet using different recipes. Hence, I've learned many things from making a variety of them and found that it's not hard to make a good scone if you could pick the right tips!

When I saw this apple and cheddar scone posted on Leite's Culinaria (where is one of my favorite sites), I was really attracted by not only a description of the scone but also a method of preparing the dough. So needless to say what I ended up doing! lol..

Although I carefully followed the recipe but a mistake happened and I was not aware of it until finishing the dough up with the egg wash..There I found all sugar called for in the recipe was missed !! But the show must go on, so I simply fixed my mistake by topping the dough with all sugar which I decided to use demerara instead of caster sugar ( how dare me..lol)

As for a verdict, despite a mistake made, yet the scone was delicious! It's a perfect combination of apple and cheddar..However, my husband who was told about the mistake said it could be better if the sugar is mixed into the dough as it's supposed to be..but I couldn't help but wonder what he would have said if he didn't know about it..lol    

The recipe could be found here..


Friday, October 29, 2010

Tarte Tropezienne

I had a week break from blogging and I've found it difficult to get myself back on track after a break no matter how long it is which I could find nothing to blame but my pure laziness!..lol.. Strange but true though that once I get it (re)started, I couldn't stop myself from doing it because there seem to be indefinite things to cook/bake and I'd like to share them here !

Now talking about the title of this post, Tarte Tropezienne, A simple pastry that is actually easy to prepare, it’s a cake with thick pastry cream sandwiched by two layers of brioche, a fluffy, buttery, sweet bread, and lightly dusted with powdered sugar on top.The Tropézienne is actually Polish, having been brought over to France by a Polish baker named Alexandre Micka living in St. Tropez. In 1955 he was hired to cater for a film crew working on a movie by Roger Vadim, starring unknown actors at the time. Each day the baker was requested to make even more of his very popular “tarte.” One of the people working in the film, a 21-year old unknown actress, suggested to the baker that he name the tarte, “la tarte Tropézienne.”

When I first had a quick look through the recipe, it seemed complicated with a long list of ingredients and preparation but when I carefully and intendedly read the whole recipe..I then found out that this gorgeous tarte is easy-peasy to make..what you need is time and being patient ! There are many recipes that can get a tarte done within a few hours or so but I chose the one that needs more time to get the dough ready to be baked becasue I personally thought that it's a proper way to make brioche!

By the way, I have to confess that this is not the first time I made it! After the first outcome failed to please myself and my husband which I figured out that what was wrong with it is a weird taste of the cream filling caused by kirch and orange flower water..so this time I decided to leave them out and added vanilla bean instead..

I was very happy with the brioche base which came out exactly the same as  the first time and the cream filling was definitely better than the previous one although it's not thick and set as I expected even after being left overnight in the fridge but it's forgivable once I tasted it!

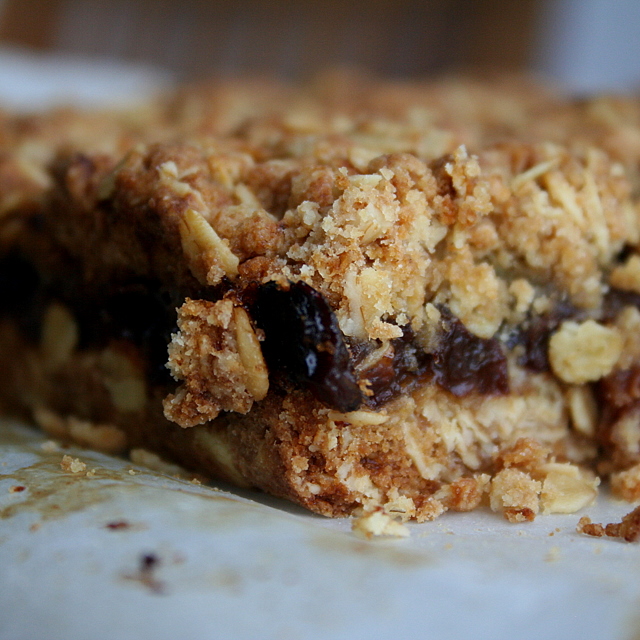
Have a look at the photos below and judge it by yourself!!


Here is my version..

The dough :

1+1/3 C Bread flour
1/2 t salt
2 T sugar
1 t active dried yeast
2 T warm milk
2 eggs
100 g butter, softened and cut into several pieces
1 egg + 1T milk for egg wash

The Cream Filling :

1 C milk
1 vanilla bean
1/4 C sugar
3 yolks
1 T cornstarch
1 T flour
2 oz (4 T) butter @ room temperature
50 ml whipping cream
1/2 T honey

Crumb Topping :

20 g butter @ room temp
2 T sugar
3 T + 2 t flour

Combine the warm milk and yeast in a small bowl. Let stand for a few minutes, then stir until the yeast is completely dissolved.

Sift together the flours, sugar, and salt into the bowl of a stand mixer fitted with the dough hook. Add the eggs and beat for 1 minute at low speed, scraping down the sides of the bowl as needed. Add the dissolved yeast and continue beating at low speed for 5 minutes. Stop the machine, scrape dough off the hook, and beat for another 5 minutes.

Add the butter a few pieces at a time, beating for about 1 minute after each addition. Once all the butter has been added, beat for 10 minutes more.Place the dough in a large bowl and cover with plastic wrap. Set aside in a warm place until doubled in size, about 2 to 3 hours.

Deflate the dough gently. Working your way around the bowl, take the edges of the dough, lift up and gently drop inward. Either cover the bowl tightly with plastic wrap or place the dough in a large plastic bag that has been very lightly oiled and refrigerate overnight. The brioche will continue to proof.

For the crumb topping, place the softened butter in a small bowl and mix the sugar in with a fork. Add the flour and mix with your hand, pinching the mixture together to form large and small crumbs. Refrigerate.

Once the dough is ready, place on a baking sheet pan lined with parchment. Pat it gently into a 9” circle about 3/4” tall. Let the dough rise uncovered in a warm place for about an hour.Preheat oven to 400°F.

Gently brush the top of the brioche with egg wash and sprinkle with the streusel. Bake the brioche in the center of the oven for about 12 to 15 minutes. Start checking at 12 minutes; the brioche should be soft, puffed and golden. Remove the brioche from the oven and immediately take the brioche off the baking sheet and place onto a wire rack to cool.

For the pastry cream, slightly boil the milk and cut length-way vanilla bean , then set aside. Whisk the sugar with the egg yolks until pale. Add the flour and cornstarch and whisk until smooth. Discard the vanilla bean, gradually add 1/2 of the hot milk to the sugar-yolk mixture, whisking vigorously to prevent the eggs from scrambling. Pour this mixture back into the saucepan and cook over low heat, whisking constantly, until the mixture thickens and boils. Take off the heat and cool a bit. Pour into a bowl and cool slightly. Press a piece of plastic wrap on the surface and refrigerate until chill thoroughly.

Whip the cream with the honey until soft peaks form. Fold half the whipped cream into the pastry cream to loosen it up. Fold in remaining cream until smooth.

To assemble, cut brioche in half horizontally. Smooth cream mixture over bottom layer, and place second layer gently on top. Chill before serve.


Ps. This post has been submitted to yeastspotting hosted by Susan of Wild Yeast

Thursday, October 14, 2010

Try-to-be a French-Style Carrot Cake

I did lots of search and experiment before to find a carrot cake recipe that is just right for myself and when I found the one, I then didn't really bother to look for another one anymore! But when I came accross this French-Style carrot cake on David Lebovitz's site , I was quite intrigued by the way he's presented his recipe and consequently, I couldn't resist my own curiosity to find out more about the cake !

However, although I had no experience and knowledge about the cake but I still had the guts to modify the recipe ( typical me!) , thus I changed a name of the cake ! As for the result, I was not sure if my cake was like it's supposed to be ( in French-Style )..the cake was thin but dense which I agree with David that it could be thicker,yet lighter than it turned out.  Personally, I prefer my favorite one to this version but you can try and judge it by yourself !

Here is the adapted recipe..

60g unsalted butter, at room temperature
1/2 scant cup caster sugar
pinch of salt
2 xl eggs, at room temperature
95 g toasted almonds
50g AP flour
1/4 cup finely grated carrot


1. Preheat the oven to 180C. Butter a shallow 9-inch cake pans and line with a circle of parchment paper. Then lightly butter the top of a circle of paper.

2. Beat the butter, sugar and salt until smooth. Meanwhile, pulverize the nuts and flour in a food processor or blender until relatively fine, but not powdery.

3. Beat in the eggs one at a time. Afterwards, stir in the ground nut mixture and the carrots, mixing just until smooth. Pour the batter into the pan, smooth it evenly, and bake for 15-20 minutes, until a toothpick inserted into the center comes out clean. Cool, then release the cake from the pans and cut in wedges to serve.


Monday, October 11, 2010

Sultana and Rum Oat Bars

I love oat and I fancy everything made into bars which I don't really know why !! When I saw these bars posted on this site, I was so convinced to give it a try because not only the bars are interesting ( in my point of view!) that there is a filling in between the oaty base and topping but also it's been a while that I didn't make anything about oat in a bar form...so I though I got enough reason to make them even without my husband's being around !

Anyway, I  made few changes to the original recipe by reducing amount of sugar and lemon juice used for the filling ( this is about nothing but my own preference!) and while the original recipe doen't call for any alcohol, I abruptly decided to add some rum when I spotted it while I was making the filling!

Here is my version ( adapted from here)

For the Crumble:


1.5 cups rolled oats
3/4 cup light soft brown sugar
1.5 cups plain flour
1 tsp bicarbonate of soda
0.5 tsp salt
3/4 cup butter, melted

Filling:

1/2 cup soft light brown sugar
2 TBS cornflour (cornstarch)
3/4 cup water
1 cup sultana raisins
the juice and finely grated zest of half lemon
1 tbsp dark rum

Preheat the oven to 180*C/350*F/ gas mark 4. Lightly butter an 8 inch square baking pan. Line with baking parchment, leaving an overhang to help lift the baked squares out.

Place all the ingredients for the filling in a saucepan, with the exception of the rum, lemon juice and lemon zest. Cook and stir until the mixture boils and thickens. Remove from the heat and stir in the rum, lemon zest and juice. Set aside.

Whisk the oats, brown sugar, flour, soda and salt together in a bowl Pour the melted butter over top and mix well together until nice and crumbly. Press half of the crumbs into the prepared pan. Spoon the sultana filling evenly over top. Sprinkle the remainder of the crumbs over top and press down lightly. Bake for 25 - 30 minutes until golden brown and firm to the touch. Allow to cool completely before cutting into bars to serve.


Saturday, October 9, 2010

Maqloobeh

Maqloobeh is a word in Arabic means upside down. As a food, it's one of classic and famous Palestinian dishes which is cooked in a deep pot then served upside down on a large serving plate!

Not only its cutie name ( which I still haven't known how to pronounce it correctly!) that simply attracted me but where the dish originated in also made me interested..and when I saw it at first on this site. I knew myself that I couldn't miss trying the dish!

Anyway, I ended up using another recipe that I've found from my search and you can find it from here..


Sunday, October 3, 2010

Drunken Apple Cake

I was attracted by the name of this apple cake when I saw it posted on Leite's Culinaria and honestly speaking, it's the only reason why I decided to give it a try! lol..

Fortunately, the cake doesn't require anything complicated..not even having to make yourself drunk (like the cake!) to get it done nicely :) what an easy-peasy recipe! If you fancy apple cakes, I reckon you shouldn't miss it!

The recipe could be found here.